We already discussed whether or not you should take Microsoft up on their offer to upgrade you to Windows 10. In that article, I specifically mention that, although Windows my prompt you to perform the upgrade, even if you want to it, it may be wise to wait a month to see if any headlines emerge with catastrophic upgrade stories, and give Microsoft time to patch the Upgrade process, if so. Perhaps waiting until November of 2015 isn’t so bad. You have a full year to claim the free upgrade, so don’t be in a rush.
When you’ve decided you’re going forward with the upgrade, it’s a good idea to make sure you’re doing it safely. As I mentioned in that post (despite my cautionary advice to “wait and see”), I firmly believe the upgrade process will have an extremely high success rate, Microsoft is confident in their upgrade path, or else they wouldn’t be offering it to the general public. But there are chances for errors, and if something goes awry, you should be able to get your computer back in working order. So here’s what Windows 7 owners will need to do (Windows 8 owners should see this post instead).
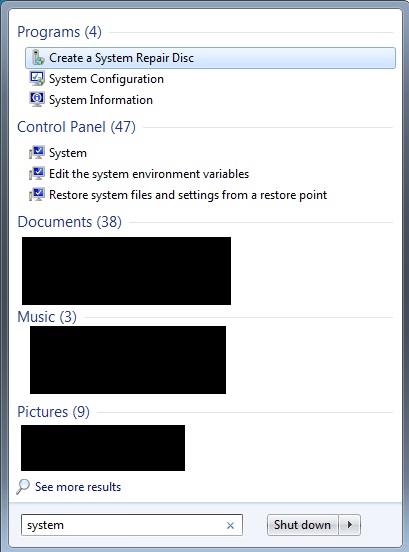
- Click your Start Menu, then type System.
- Click Create a System Repair Disc.
- Insert a blank CD-R or DVD-R in to your computer.
- Click Create disc.
(this can also be done from the “Backup” Window, seen below).
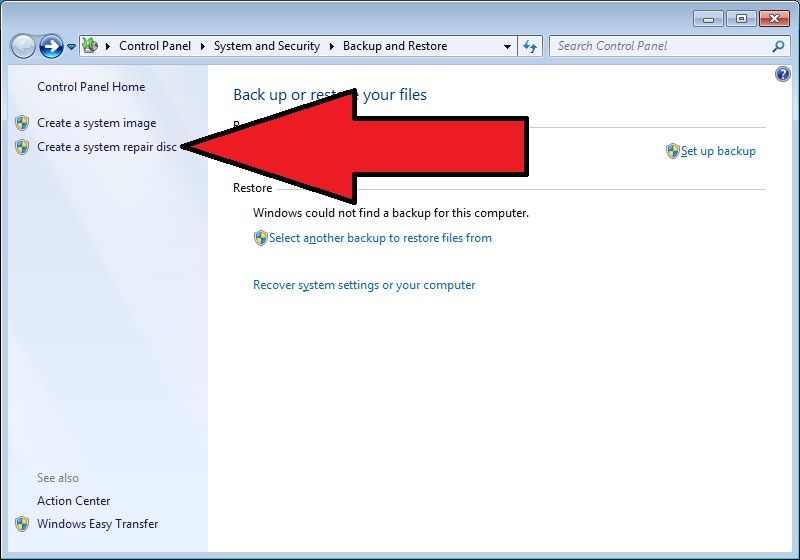
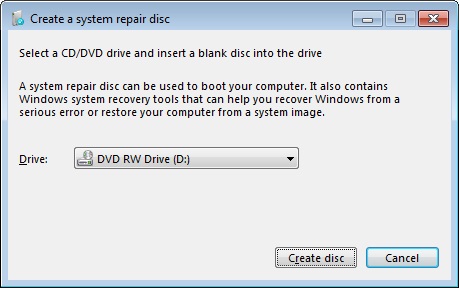
Once you’re finished, just hang on to that disc. Ideally, you won’t need it. But should something go wrong during your Windows 10 installation, you can insert the disc to begin the repair process. BUT, WE AREN’T DONE. You must proceed to the next steps so that you have something to restore.
The best method of backup is to have a USB external hard drive, bigger than the amount of used space on your computer. To find out how much disk space you have used, open up “My Computer” (or just press “Windows Key + E” on the keyboard), and look at your C:\ drive. It should say “X GB free of Y GB” – or if you right click the drive then click Properties it will give you a pie chart of used disk space. If you have 50 GB used of your disk, you should make sure you have an external USB hard drive with at least that much free space (1TB (1,000GB) hard drives can be bought for under $70 at Amazon and Best Buy, so you shouldn’t have a problem with that). Plug in the USB drive, then in my computer, right click the drive, click Format. You’ll want to format it as NTFS. Select “Quick Format” and click Start.
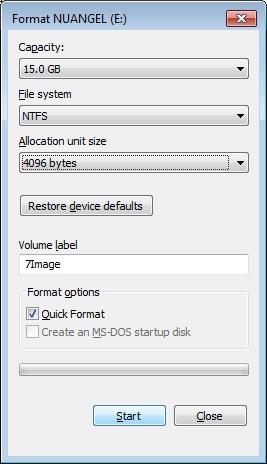
This will erase all of the data on the USB drive. If you already have data on the drive, but it is not formatted for NTFS, but rather FAT32 or ExFAT, etc… you’ll have to copy the contents of the USB drive to your C:\ drive, then format the USB drive, and copy the files back.
Now that you have a drive prepped for back up, you must create the system restore image.
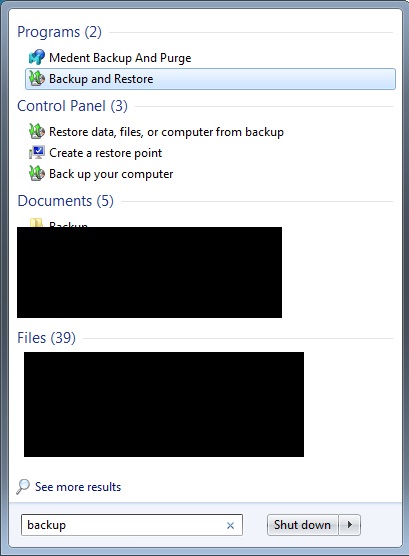
- Click your Start Menu, then type backup.
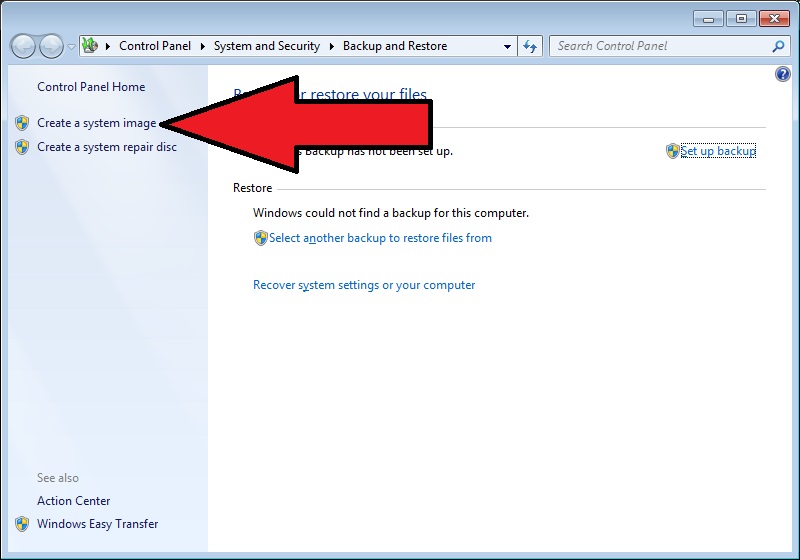
- Click Backup and Restore.
- On the left, click Create a system image.
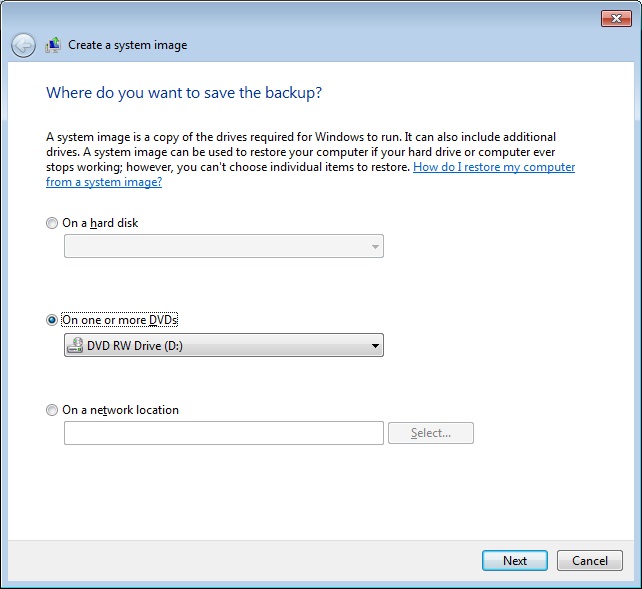
- Select your backup destination.
- As mentioned above, your best option is to choose an external USB hard drive. The target drive must be larger than the amount of data currently on your computer (again, if you have 150GB used on your C:\ drive, you should have at least 150 free GB on your USB hard drive).
- To use CDs or DVDs, you will need enough disks (if you have 50GB used on your C:\ drive, you will need at least 11 DVD-R discs).
- Click Next.
- Click Start backup.
You can specify what drives and partitions are backed up before clicking “Start backup” but for most users only the system drives are necessary.
Should you ever need to restore your Windows 7 installation from this system image, insert the Repair Disc you created in the first half of this process and reboot your computer. One of the options will eventually be to restore from a system image that you created. That is when you’ll either insert the last of however many CD’s / DVD’s you backed up to, or attach your USB hard drive and point the computer to your image on your drive.
Again, these backups will hopefully never even have to be used. Best of luck with your upgrade!

