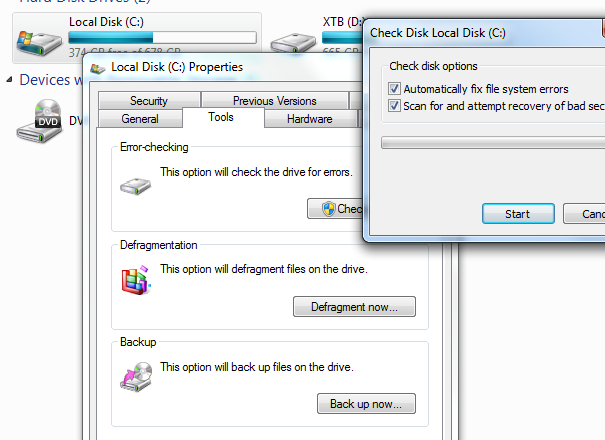
Sometimes you might get a little worried that the data on your hard drive are getting corrupted. Occasionally, you might be compelled to run a “chkdsk” or “Check Disk” process (or, in Windows 9x terms, a scan disk!). The process is fairly simple. Here is how you do it in Windows 7, and the steps are nearly identical for Windows XP.
- Open up Computer (or My Computer) either from the Desktop or the Start Menu.
- Right Click on the drive you want to scan.
- Click Properties.
- Click the Tools tab.
- Click the Check now… button.
- Check both boxes (if you want to scan the drive itself for defects, rather than just search for corrupt files).
- Click Start.
- Click Schedule Disk Check.
- Click OK, then Reboot!
During the startup process, the screen will have a 10 second count down that you can interrupt if you need to – but after the count down completes the scan process will start. It takes, on average, about an hour. The screen should say that it is on Phase 1 of 5 if you are doing the full surface scan.
