Why does my IT guy always tell me to reboot?

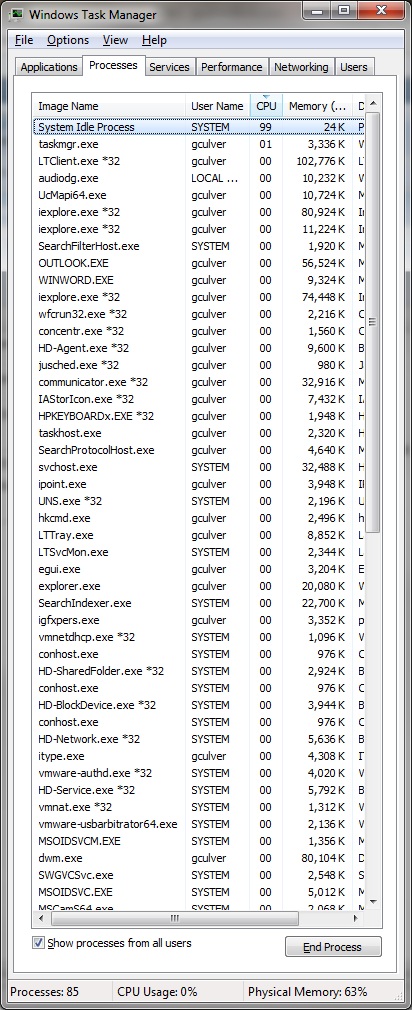
Because it works. I wish I could say that more often. But the reality is, it lets us start with a clean slate. Your computer has a lot going on, even when you are only running one or two programs. When a Windows XP computer boots up, around 100 programs and services load with it, and that is on a new PC without a lot installed on it!

Continue reading “Why does my IT guy always tell me to reboot?”

FTP for Windows RT

Update 1: if the idea of the command prompt doesn’t appeal to you, read Clive’s comments below this post for using the Windows Explorer FTP feature, or see my new article about mFTP, a free app from the Windows 8 Store.

Some things we just take for granted. Maybe you’ve used CoffeeCup FTP, FileZilla, or CuteFTP – well whatever you’re used to, it’s not in Windows RT. You just had to get a Microsoft Surface, didn’t you? Haha, it’s okay, so did I. But, since you can’t go back to old familiar stand-by FTP clients, I asked this week what option you have when you need to upload a file to an FTP server in a pinch? Relax, Microsoft has had you covered for over a decade!

Windows RT has a command prompt. It’s true! From the Start Screen, just type three letters: cmd and a command prompt icon will appear. Click that. Look familiar? Good. Now you can type ftp exampleservername.com – and away you go! Perhaps, in yourcase, it’ll be ftp.exampleservername.com, whatever… you should know your own server. The point is, once logged in, you can upload and download files through the command line!

The two biggest things to know: first, by default you’re in ASCII mode, which is for transferring text files – to transfer a binary file, you should switch to BINARY mode. Just type the word “binary” and you’ll switch modes – then you can upload MP3s, JPGs, PNGs, EXEs, and so on. Second: if you are trying to upload or download files to the server, they are coming from and going to whatever folder you were in before you started the client. You can use the “lcd” command to change your local directory, but by default you start out in C:\Users\YOURUSERNAME\.

More commands and important sub commands are available on Microsoft.com, though a simple HELP command will present you with some helpful information.
How to clean that cluttered Windows 8 Start Screen

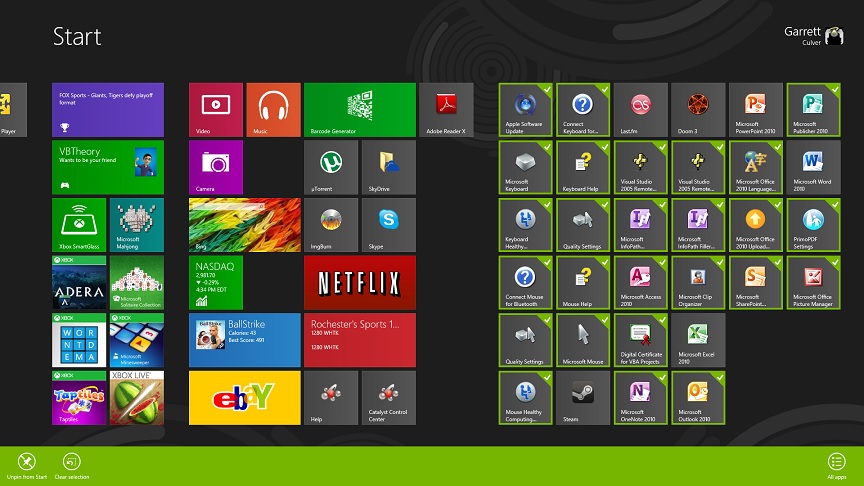
So you just got a new Windows 8 PC, and you installed a few programs. For instance, Office 2010 was just installed to your new computer. Now your Windows 8 Start Screen has a ton of icons on it that you don’t want to see or use. How do you clean the clutter? Here’s the quick, easy way to do it:

Hold CONTROL and click on the icons you want to get rid of. This will allow you to click multiple icons, one at a time. As you do, you’ll see a checkmark appear in the upper left hand corner. Once you have the items you want to remove selected, simply click Unpin from Start in the bottom left corner of the screen. Poof. The icons disappear. Another option is to browse to the Start Menu Folder, where you can easily manage the items on the Start Screen as if it were a folder.

Also, don’t forget that you can right click on an icon and click the smaller or larger button to make it a single square or a wider icon, which can help you truly customize your Start Screen and make it your own.

Customizing the background of your Windows 8 Start Screen

Windows 8’s biggest change from the last several revisions of Windows is the advent of the Start Screen to replace the Start Menu. I’ve been asked “how do I change the background of my Windows 8 Start Screen?” by a few people lately. As more and more screenshots release just prior to the launch of Windows 8, people are seeing different colors, designs, background images… and they want to know how to get in on the customization action. It’s simple.

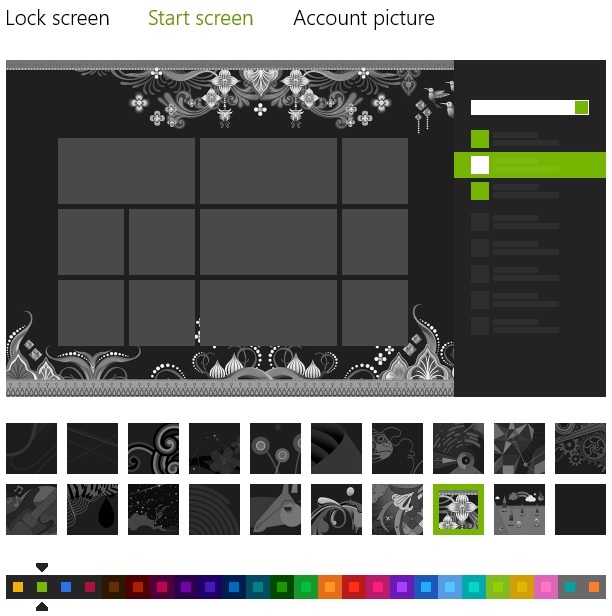
From within the Start Screen, bring up the Charms Menu – you can do this by placing the mouse in the lower right hand corner of the screen, or by pressing the keyboard combination of “Windows Key” + C. Then click on Settings then Change PC Settings. From there, it should default to the Personalize menu on the left, the top item. Then, on the right hand side of the screen, across the top you should have 3 options: Lock screen (see our article on customizing the lock screen!), Start screen, and Account picture. Select Start screen.

Once you’re there, you can choose from several color-themes ranging from dark themes with colorful tiles and highlights, to more light hearted themes with richer, more plentiful colors. Then you also have your choice of 2- different ‘scenes’ in the background, to which those colored themes will be applied. Some of them are themed similarly to existing Microsoft products, like the Xbox 360’s “Jelly Swirls.”