

We already discussed whether or not you should take Microsoft up on their offer to upgrade you to Windows 10. In that article, I specifically mention that, although Windows my prompt you to perform the upgrade, even if you want to it, it may be wise to wait a month to see if any headlines emerge with catastrophic upgrade stories, and give Microsoft time to patch the Upgrade process, if so. Perhaps waiting until November of 2015 isn’t so bad. You have a full year to claim the free upgrade, so don’t be in a rush.
When you’ve decided you’re going forward with the upgrade, it’s a good idea to make sure you’re doing it safely. As I mentioned in that post (despite my cautionary advice to “wait and see”), I firmly believe the upgrade process will have an extremely high success rate, Microsoft is confident in their upgrade path, or else they wouldn’t be offering it to the general public. But there are chances for errors, and if something goes awry, you should be able to get your computer back in working order. So here’s what Windows 8 owners will need to do (Windows 7 owners should see this post instead).
For this process, you’re going to want to have a USB drive, preferably a flash drive (AKA Jump Drive, Thumb Drive, Pen Drive, etc…). 4 GB is usually large enough, as this process does not create a backup of all of your data, rather it creates a recovery drive which will allow you to reinstall Windows 8.1 if something should go wrong in the Windows 10 upgrade. To backup all of your data, see the article on Windows 7, the process is much the same in Windows 8.
Enter File Explorer / My Computer, right click your USB drive, and click Format from the right click menu. You’ll want to format it as NTFS. Select “Quick Format” and click Start.

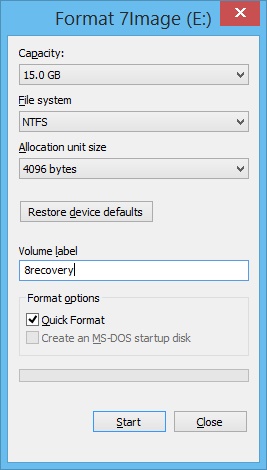
This will erase all of the data on the USB drive.
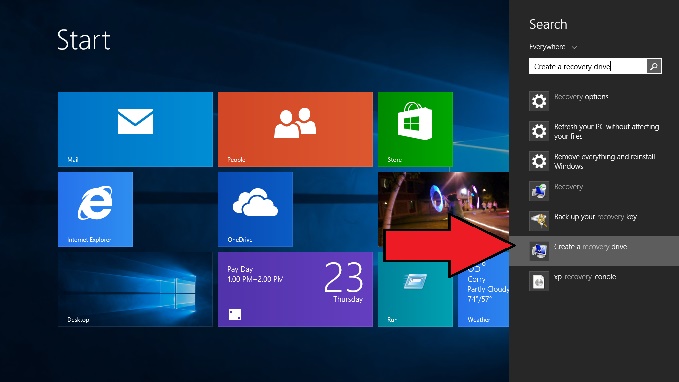
- From the Start Screen with the large tiles, type Recovery (it doesn’t matter if you can see a cursor or not, just begin typing and the search bar will automatically slide in from the right).
- Click Create a Recovery Drive.
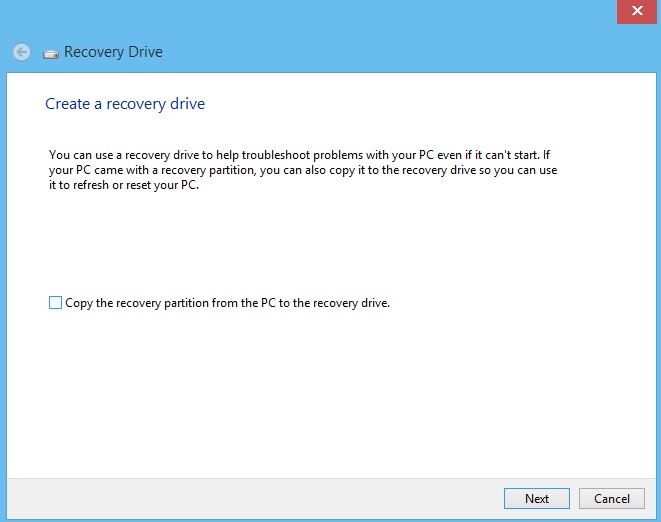
- If there is a checkmark to copy the recovery partition to the drive:
- Ensure the box is checked to copy the recovery partition and click next.
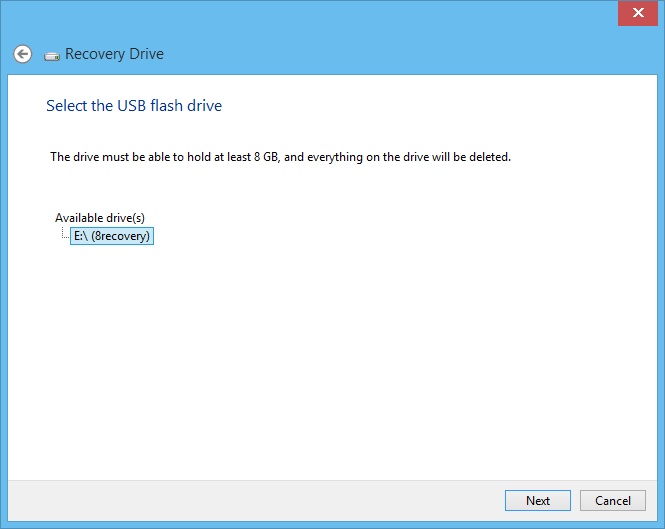
- Ensure the “Available Drive” selected is the USB drive you wish to copy to.
- Click Next.
- Click Create.
-This will restore your computer to factory defaults if you ever need to boot from the recovery drive and restore Windows 8.
- If you are not prompted to copy the recovery partition (if your computer doesn’t have one), or if you wanted a generic Windows Recovery drive, rather than one from your manufacturer (not recommended, if you have the option to copy the recovery partition, DO SO):
- Uncheck the box, then click Next.
- Ensure the “Available Drive” selected is the USB drive you wish to copy to.
- Click Next.
- Click Create.


There you have it! At least you can get back to a working computer should something happen to fail in the Windows 10 upgrade process. But here’s to hoping you have no problems and a smooth transition to Windows 10! See you on the other side!